Showing posts with label reuse. Show all posts

Monday, January 14, 2013

You don't need to spend paper for these

One of the most annoying things to me is when I go to my mailbox and see that it's filled with nothing but junk mail.  They go straight into the recycling, I don't even bother to read them or clip coupons or whatever you do with them.  But maybe if I turn them into useful decorative crafts then I may end up looking forward to them.
Here are some awesome ideas for your junk mail:


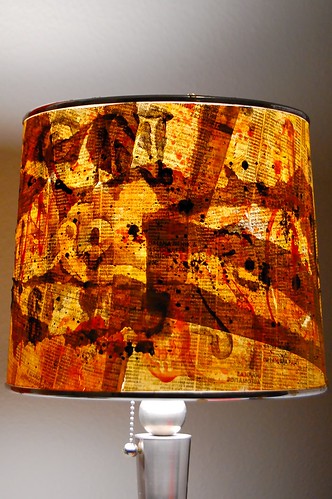
Newspaper lamp tutorial is at Swell designer


Junk mail bow tutorial at Michele made me


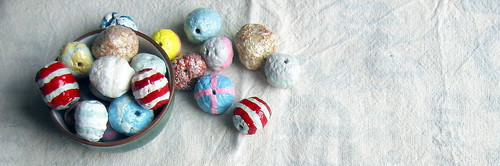
Junk mail beads here: The new new


Seed bombs at Mademoiselle chaos

And of course there are numerous other things you can do with junk mail but I thought these were pretty cool.

Sunday, January 13, 2013

Getting scrappy

Right now I have a big (and getting bigger) bag of fabric scraps.  I hate throwing away tiny little strips especially since fabric can get pretty spendy so I decided that I should compile a list of all the things you could do with them.  But once I started looking up all the possibilities I realized that this post would be miles long if I put everything here.  So I decided to be lazy and to link some to you folks.
Here they are:
Scrap happy
Martha Stewart (gotta include the queen of the home)
Holding onto the little things - I particularly love the fabric wall art panels and fabric scrap necklaces from this website
Craft stew

I want to hear from you guys!  What crafty things have you done with fabric scraps?

Friday, January 11, 2013

Toilet paper strikes again!

Ever since I completed my craft for my post Toilet trees I just didn't feel like I had done toilet paper roll crafts justice.  It was my first craft and I didn't really have a lot of toilet paper rolls to begin with so my options were limited.  But since then, I've been saving all the empty toiler rolls and I finally decided to do something with my over flowing bag of them.  I think I've made my favorite craft yet:


A geometric wall decoration!  Isn't it beautiful??  It took a lot of time and it was a bit of a mess because of the paint but it was so worth it.

So here's what you need:


-A bunch of toilet paper rolls
-Scissors
-Hot glue gun
-Paint of any color (or no paint if you like the brown)

To start:


Cut your rolls into quarters, this will make them the perfect depth but I guess you could go thicker if you wanted.  I wouldn't make them any thinner though since they have a lot done to them


Pinch the roll pieces so that they resemble petals.  Thankfully the roll automatically does this a bit when you cut them so you only have to reinforce the crease


First I made the center part and then painted it white and then once dry, I glued the parts together


Then I mixed some yellow and red into the white to make a lighter color of what I wanted  to end up with


I made sure to place the outside layers before gluing them to make sure I have the right pattern.  Make sure the colored rolls are completely dry before adding them to the white ones because otherwise you could smudge the white like I did on a few of them


Here's a photo of me placing them before painting them.  I found that as the piece got bigger it was a little confusing to remember where I planned to put the rolls so I highly recommend taking pictures to look back and reference once the rolls are painted


Here's my second to last layer, I added more red and yellow to this layer to create that fade effect.  As the wall decoration gets bigger, the rolls will get a bit smooshed but it didn't ruin the look


Here's the finished piece drying.  It looks like there are weird gaps since this picture is at an angle but once you put it against a wall it looks symmetrical


Here it is on while wall, I think it adds a nice pop of color


I think this was my favorite color that it went against.  I would love to see it against a deep blue colored wall but we don't have any of those in my house.  Make sure if you're mounting it on a wall you hang it by one of the white middle ones so that it can support itself.  It might rip if you try and hang it from the darker outside one

Thursday, January 10, 2013

Bottle it up

We've all been there before, you have a house party with a bunch of good friends, drinks are had and everyone has a good old time (hopefully).  The next morning when you wake up you're amazed at all the places that bottle caps can end up.  In rooms people weren't even in, on shelves, counters, chairs, sinks, you name it, they're there.  Now most people would probably throw these out, but there are actually a lot of really cool things you can do with bottle caps considering it seems so wasteful to throw away all of those pieces of metal.
Here are some cool ideas:


You can make a bottle cap picture frame or a frame for a mirror.  I think it would be neat to use caps from one type of beer and making something with that.  It would make a great gift for someone who drinks only one kind or for a bachelor pad or something


If you paint some bottle caps or glue really cool beads or buttons you can make jewelry out of them


You can do the same thing with the jewelry but make fridge magnets.  I really like this idea for stocking stuffers or cute little gifts for fun


Or you can just do this if you have all the time in the world and a seemingly endless supply of bottle caps


Wednesday, January 9, 2013

Cork dork

So as I mentioned in my post Corky projects I was going to do a project using old wine corks.
Well I kept my promise and I completed my very own cork board.  This is another one of those too-easy-to-be-real projects, but here's proof that crafts really can be super cheap, super easy and really cute.


There it is sitting proudly on my wall.  The cool thing about this piece is that it can be functional or just decorative


Here it is being a functional cork board
So how do you make it?
Here's what you need:


-A picture frame
-A bunch of corks
-Hot glue gun (not pictured)


The frame that I chose was only $3 dollars at the Goodwill bins.  I saw some really giant ones that were only like $10 dollars but I wanted to make sure I worked out the kinks in a smaller frame before moving up in size.  This is I'd say the only purchase you'd have to make for this project, unless you already have a frame that you'd like to use

So here's what I did first:


I sorted out all the same size corks and got an idea of how many I would need to fill the frame (I ended up needing a few more than this since this isn't the final pattern).  I also kept the glass in the frame because it created a stable base


Next I arranged the corks in the final pattern and hot glued them by vertical rows so I could make sure it would all fit.  I suppose you could glue it horizontally but I don't recommend gluing random corks because you could end up with empty spaces or not enough room.  
As you can see at the top of the picture there wasn't enough room for whole corks so I cut them in half and it worked out really nicely


And there it is!  I want to make a lot more of these in all different sizes since they were so easy and fast and if you buy the frames at the bins then you will spend hardly any money on them.  

Monday, January 7, 2013

Can't let it go

As I mentioned in my post Nothing you can wine about , I had originally planned to make candle votives out of my wine bottles by using a method I kept hearing about online.  The method is where you take a piece of string soaked in nail polish and wrap it around the part of your bottle you want to remove, then you light it on fire and dunk it into cold water really fast.  This apparently makes a really clean cut and you only have to sand the glass slightly to smooth it out.
Well, the string for some reason would not stay lit.  So I tried it with lighter fluid (maybe not the best idea) and that lit for a brief second.  Then I saw something about scoring the bottle first with a fancy glass cutter and then using boiling water and cold water to get the bottle to break cleanly.  I only had a hack saw and I barely scratched the surface.
So I got some suggestions from friends, did a little research and am now making this blog post in the hopes that the poor soul out there who tries to do what I did won't.
Here's the video that I saw talking about the different methods of glass cutting:


Also this:
Unfortunately both methods involve stuff you probably don't have lying around but there are a lot of different types out there that cost different amounts so you might get lucky and find a cheap one.

Anyways, now that I know how to properly cut glass, I may get my tail out from between my legs and try it again soon.

Thursday, December 27, 2012

Bright ideas

As many have heard, soon the incandescent light bulb will be a thing of the past.  This got me thinking: within a relatively short period of time, the incandescent bulbs being used now will burn out, and that's it.  Once they're gone, they're gone.  So why not do something sentimental with those old bulbs?
Even if incandescent light bulbs were not energy efficient, you can give them a second wind and upcycle them.
Here are some cool ideas:

Yes that is a fish in a light bulb


My only question is how do the water it?

Better Budgeting (I linked some of these to their respective blogs to give them credit)


Here are some instructions for how to hollow out a light bulb: